PIZZALYTICS

Every pizza tells us something. Pizzalytics is where I investigate why—through experiments, close observation, and the science behind fermentation, flour, mixing, and heat.
Making sense of those details is what I do best. Here, I share what I’m testing, what I’m learning, and how it can help you make better pizza.
WHAT DO YOU WANT TO INVESTIGATE?
FLOUR & HYDRATION
Explore how flour selection and water levels change the way dough behaves.
FERMENTATION
Take a closer look at time, temperature, and the signs of dough readiness.
HEAT & THE BAKE
Investigate how the oven and baking process shape the crust, crumb, and texture.
FLOUR & HYDRATION
Water absorption. Gluten development. Dough behavior.
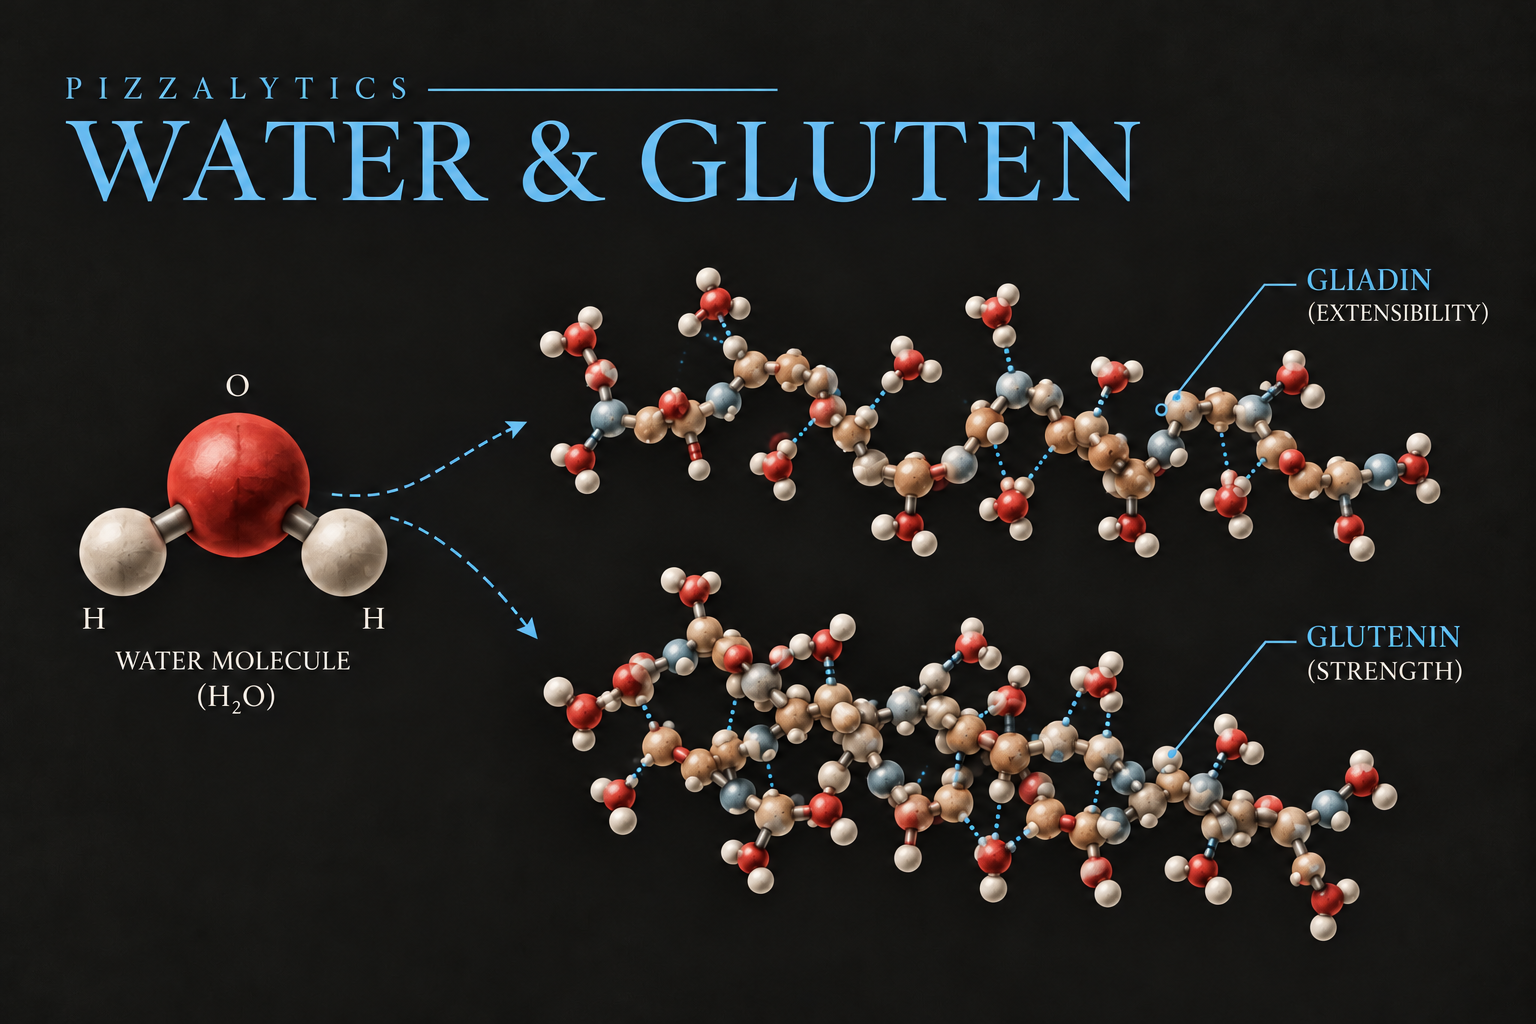
Hydration is the weight of water expressed as a percentage of flour weight. It measures the formula’s water content; flour composition determines how that water interacts with the dough.
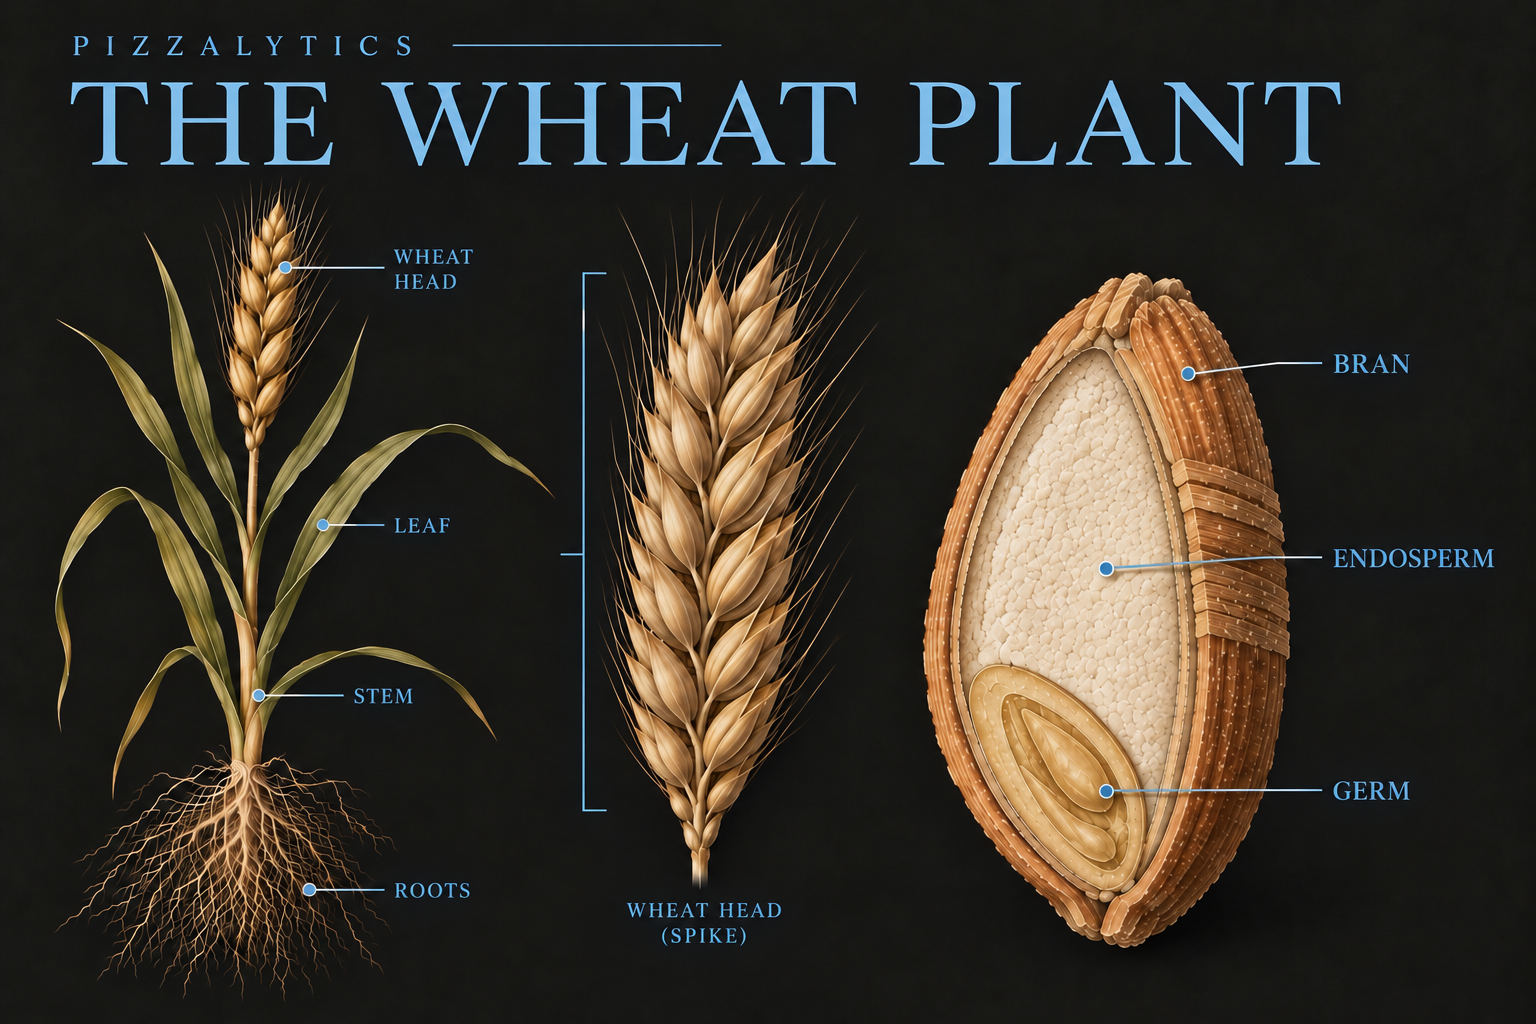
Gluten-forming proteins absorb water and develop a network during mixing. Starch and fiber also bind water, influencing dough consistency. Differences in protein quality, starch damage from milling, and bran content help explain why two flours at identical hydration can behave differently.
READ THE STRUCTURE
Observe cohesion during mixing, elasticity—the tendency to spring back—and extensibility—the ability to stretch. Track dough temperature alongside these indicators. Together, they help you assess how the dough develops and responds to handling.
ISOLATE THE VARIABLE
Compare two batches using the same flour at different hydration levels. Keep yeast, salt, dough weight, fermentation conditions, and baking conditions consistent. Record mixing time and final dough temperature, then compare spreading, gas retention, crumb structure, and texture after cooling.
The aim is to connect a measured change in water to an observable change in performance.
Click to dive deeper
Click to dive deeper
Follow what happens as the dough ferments.
See how heat transforms that structure.
Follow the flour and water through a complete process.
Have a question worth a detour? Let’s talk about your dough.
FERMENTATION
Microbial activity. Temperature. Gas retention.
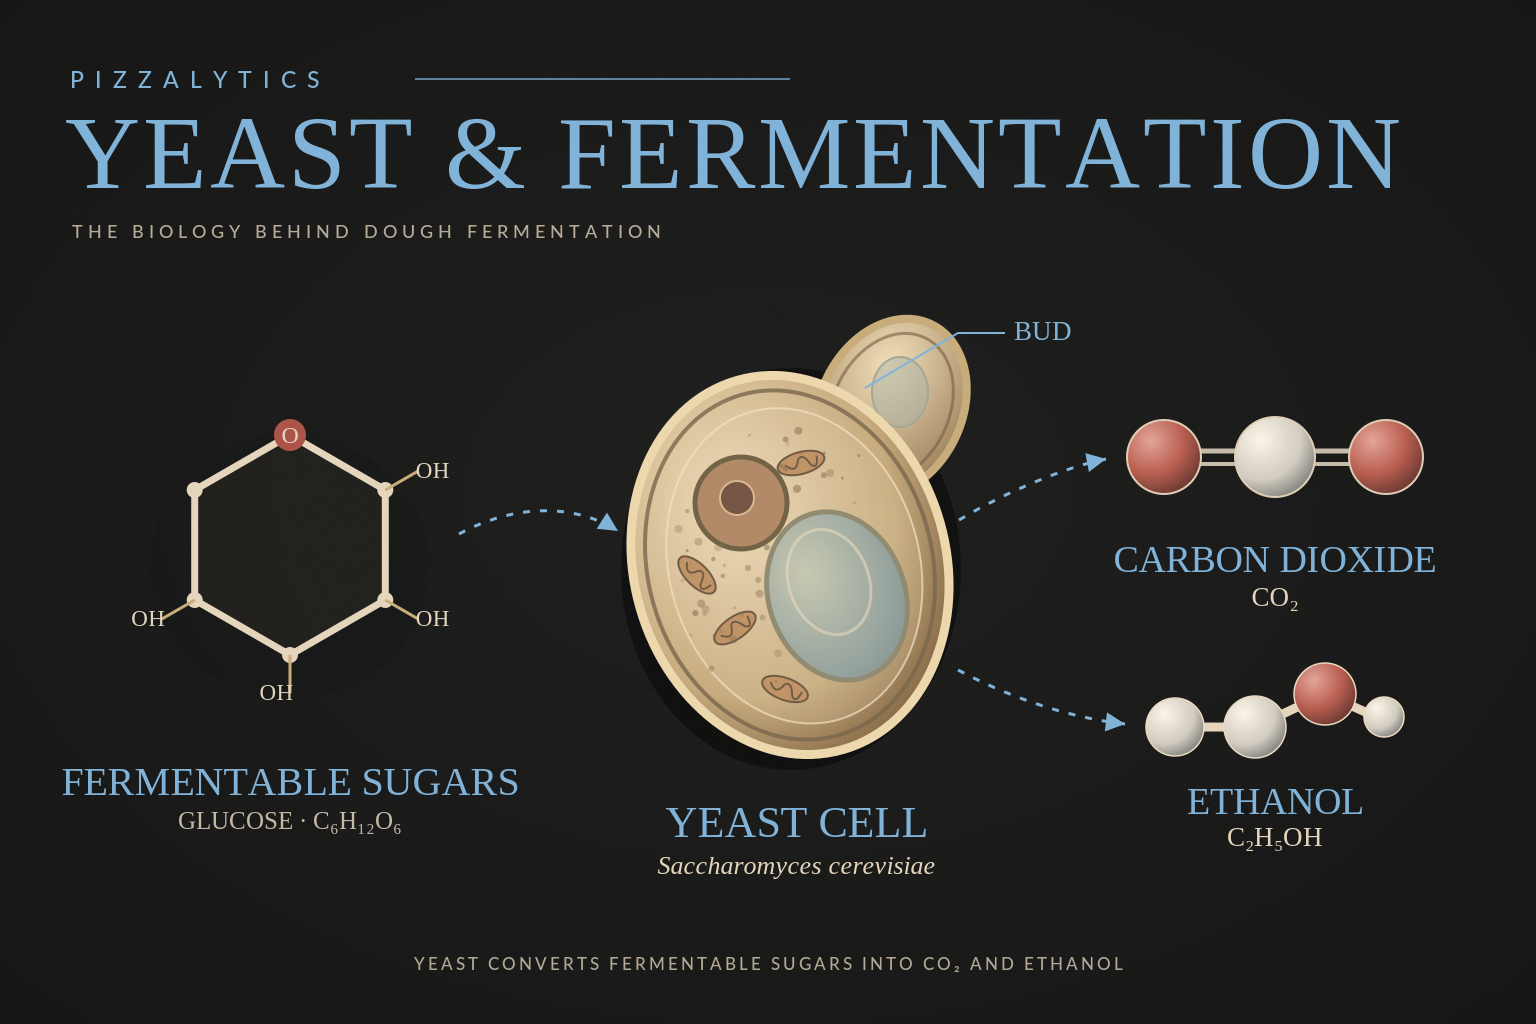
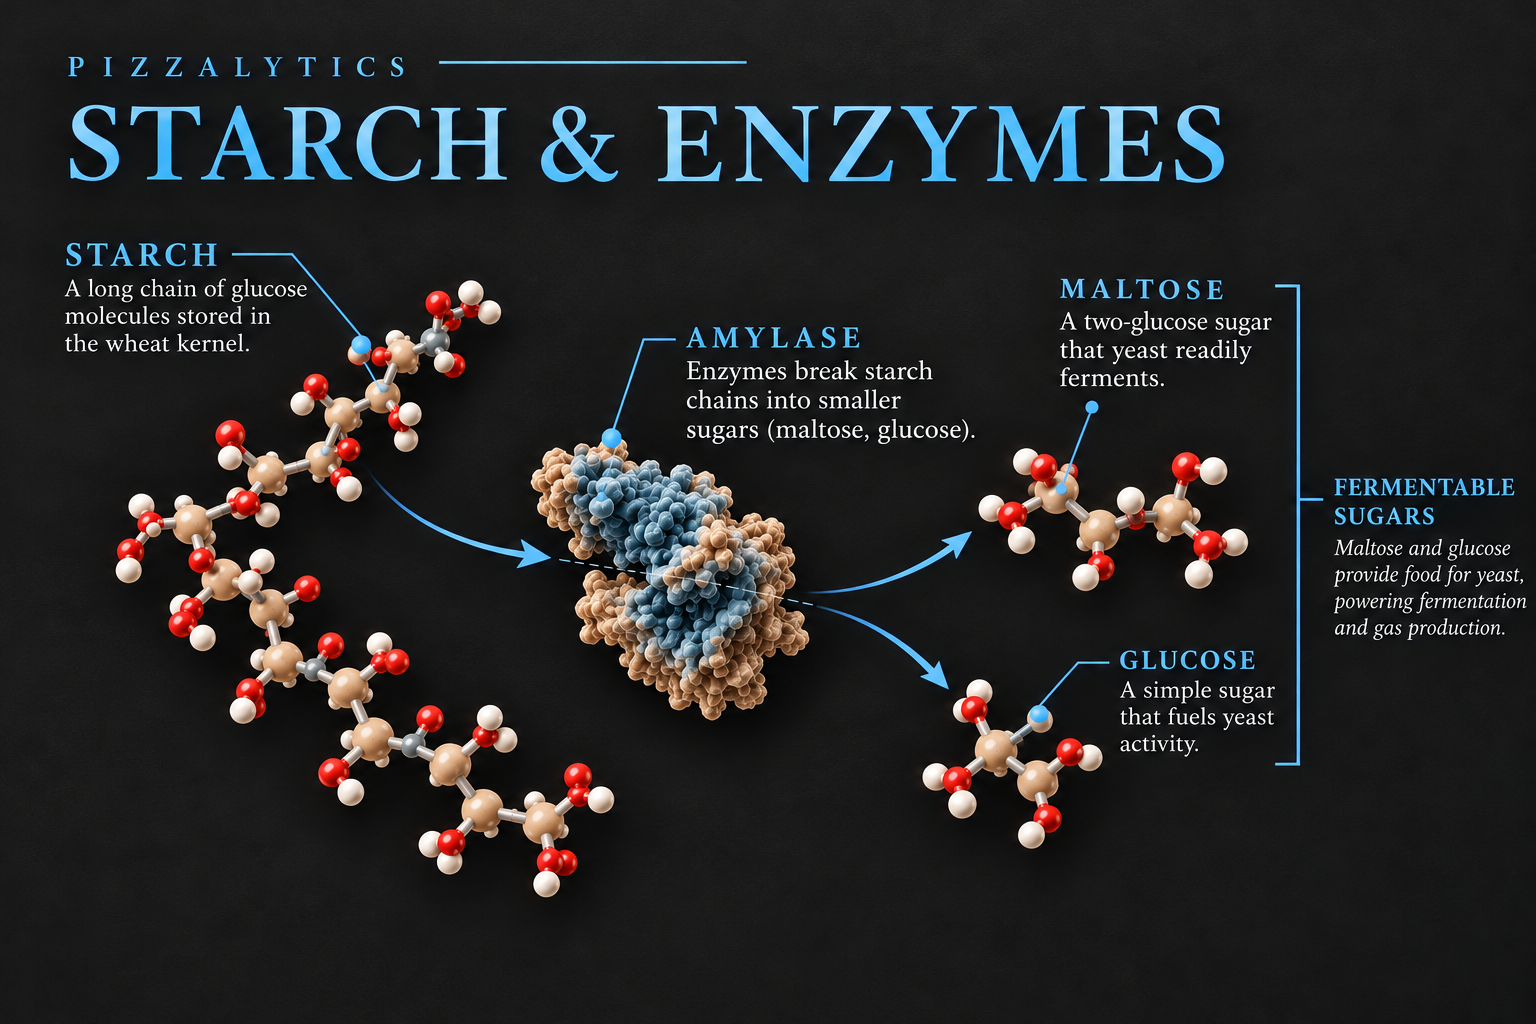
Yeast metabolizes available sugars, producing carbon dioxide and ethanol. As gas accumulates within the dough’s gluten network, the dough expands. In sourdough, lactic acid bacteria also contribute acidity and flavor.
Temperature influences the rate of this activity. The same formula can develop differently depending on its temperature after mixing and throughout fermentation. Time becomes more useful when measured alongside temperature and dough behavior.
READ THE ACTIVITY
Observe volume increase, bubble distribution, aroma, and the dough’s response to handling. Distinguish gas production from gas retention: dough must both generate gas and maintain enough structure to hold it.
Evaluate these indicators together. Visible expansion alone doesn’t tell you whether the dough is ready to open and bake.
ISOLATE THE VARIABLE
Divide one batch into equal portions and ferment them at two controlled temperatures. Keep containers, handling, and observation intervals consistent. Record actual dough temperatures and the time each portion takes to reach a defined volume increase.
Then compare extensibility, gas retention during opening, and the finished bake. This connects fermentation conditions to measurable changes in dough performance.
Click to dive deeper
Click to dive deeper
Go back to the ingredients shaping the dough’s behavior.
Follow the fermented dough into the oven.
See where fermentation fits into the full process.
Have a question worth a detour? Let’s talk about your dough.
HEAT & THE BAKE
Heat transfer. Structure formation. Moisture loss.
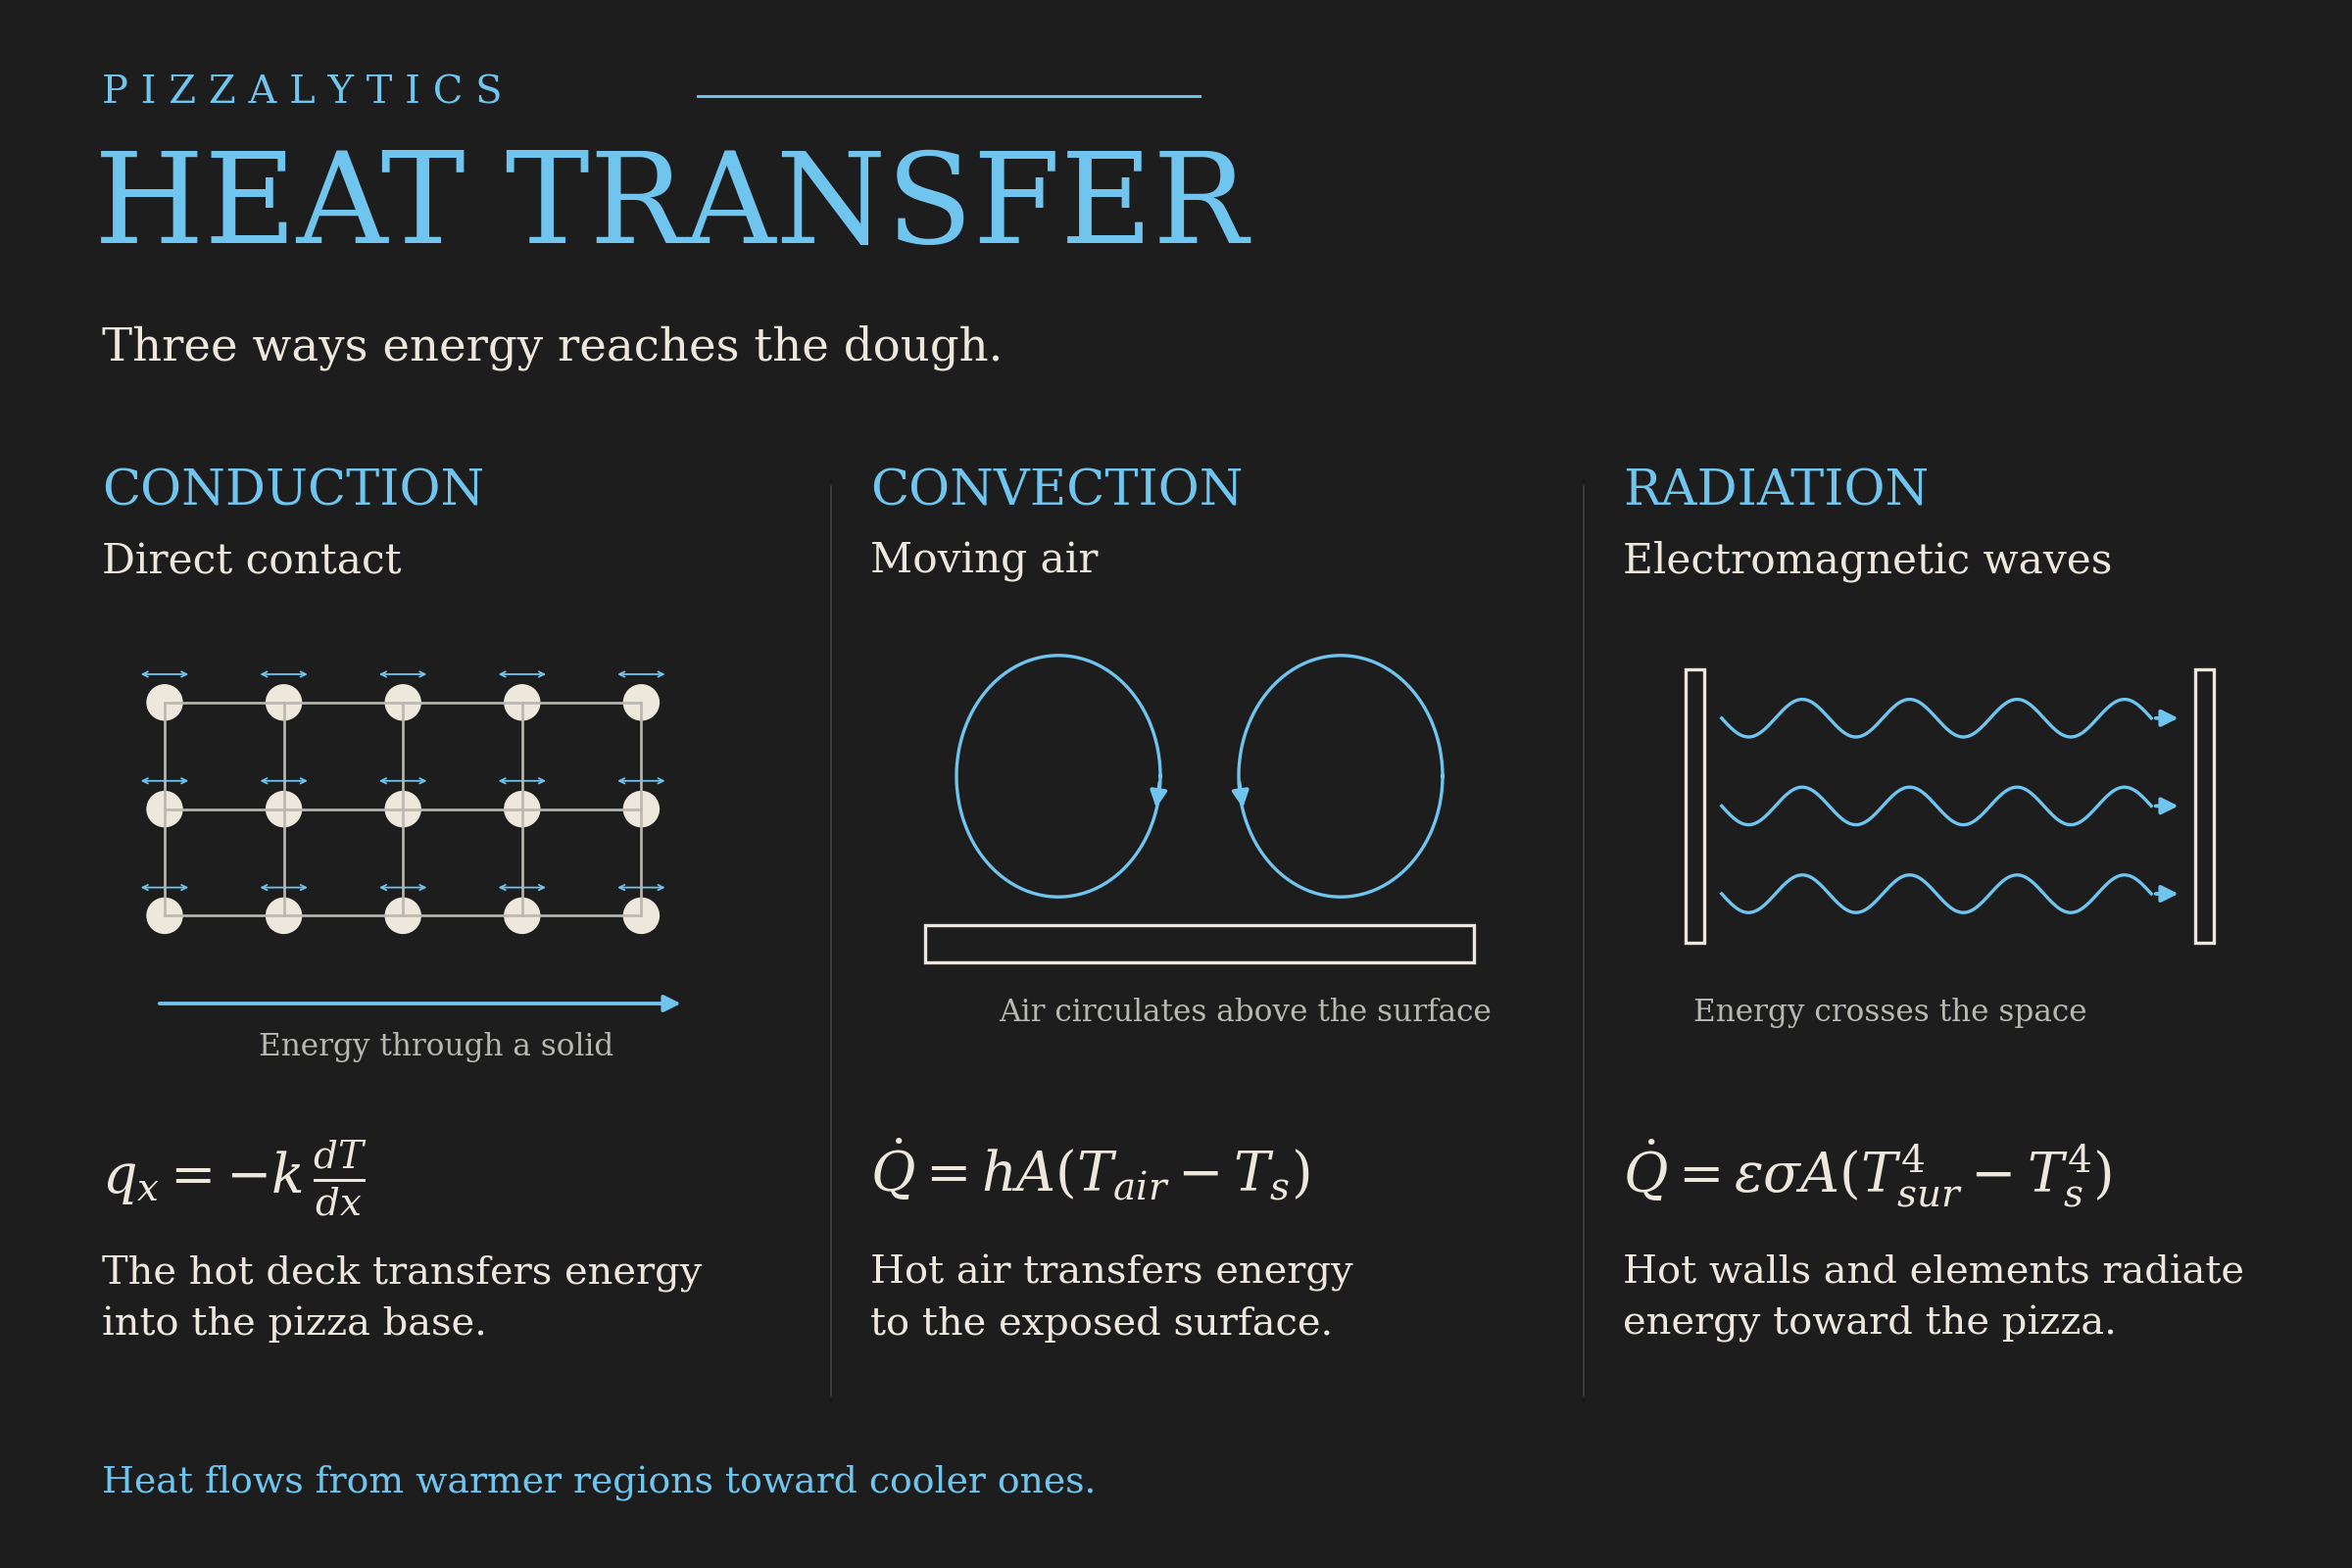
Heat reaches pizza through conduction from the baking surface, convection from hot air, and radiation from the oven’s walls and heat sources. The balance between these determines how the base, interior, and toppings cook.
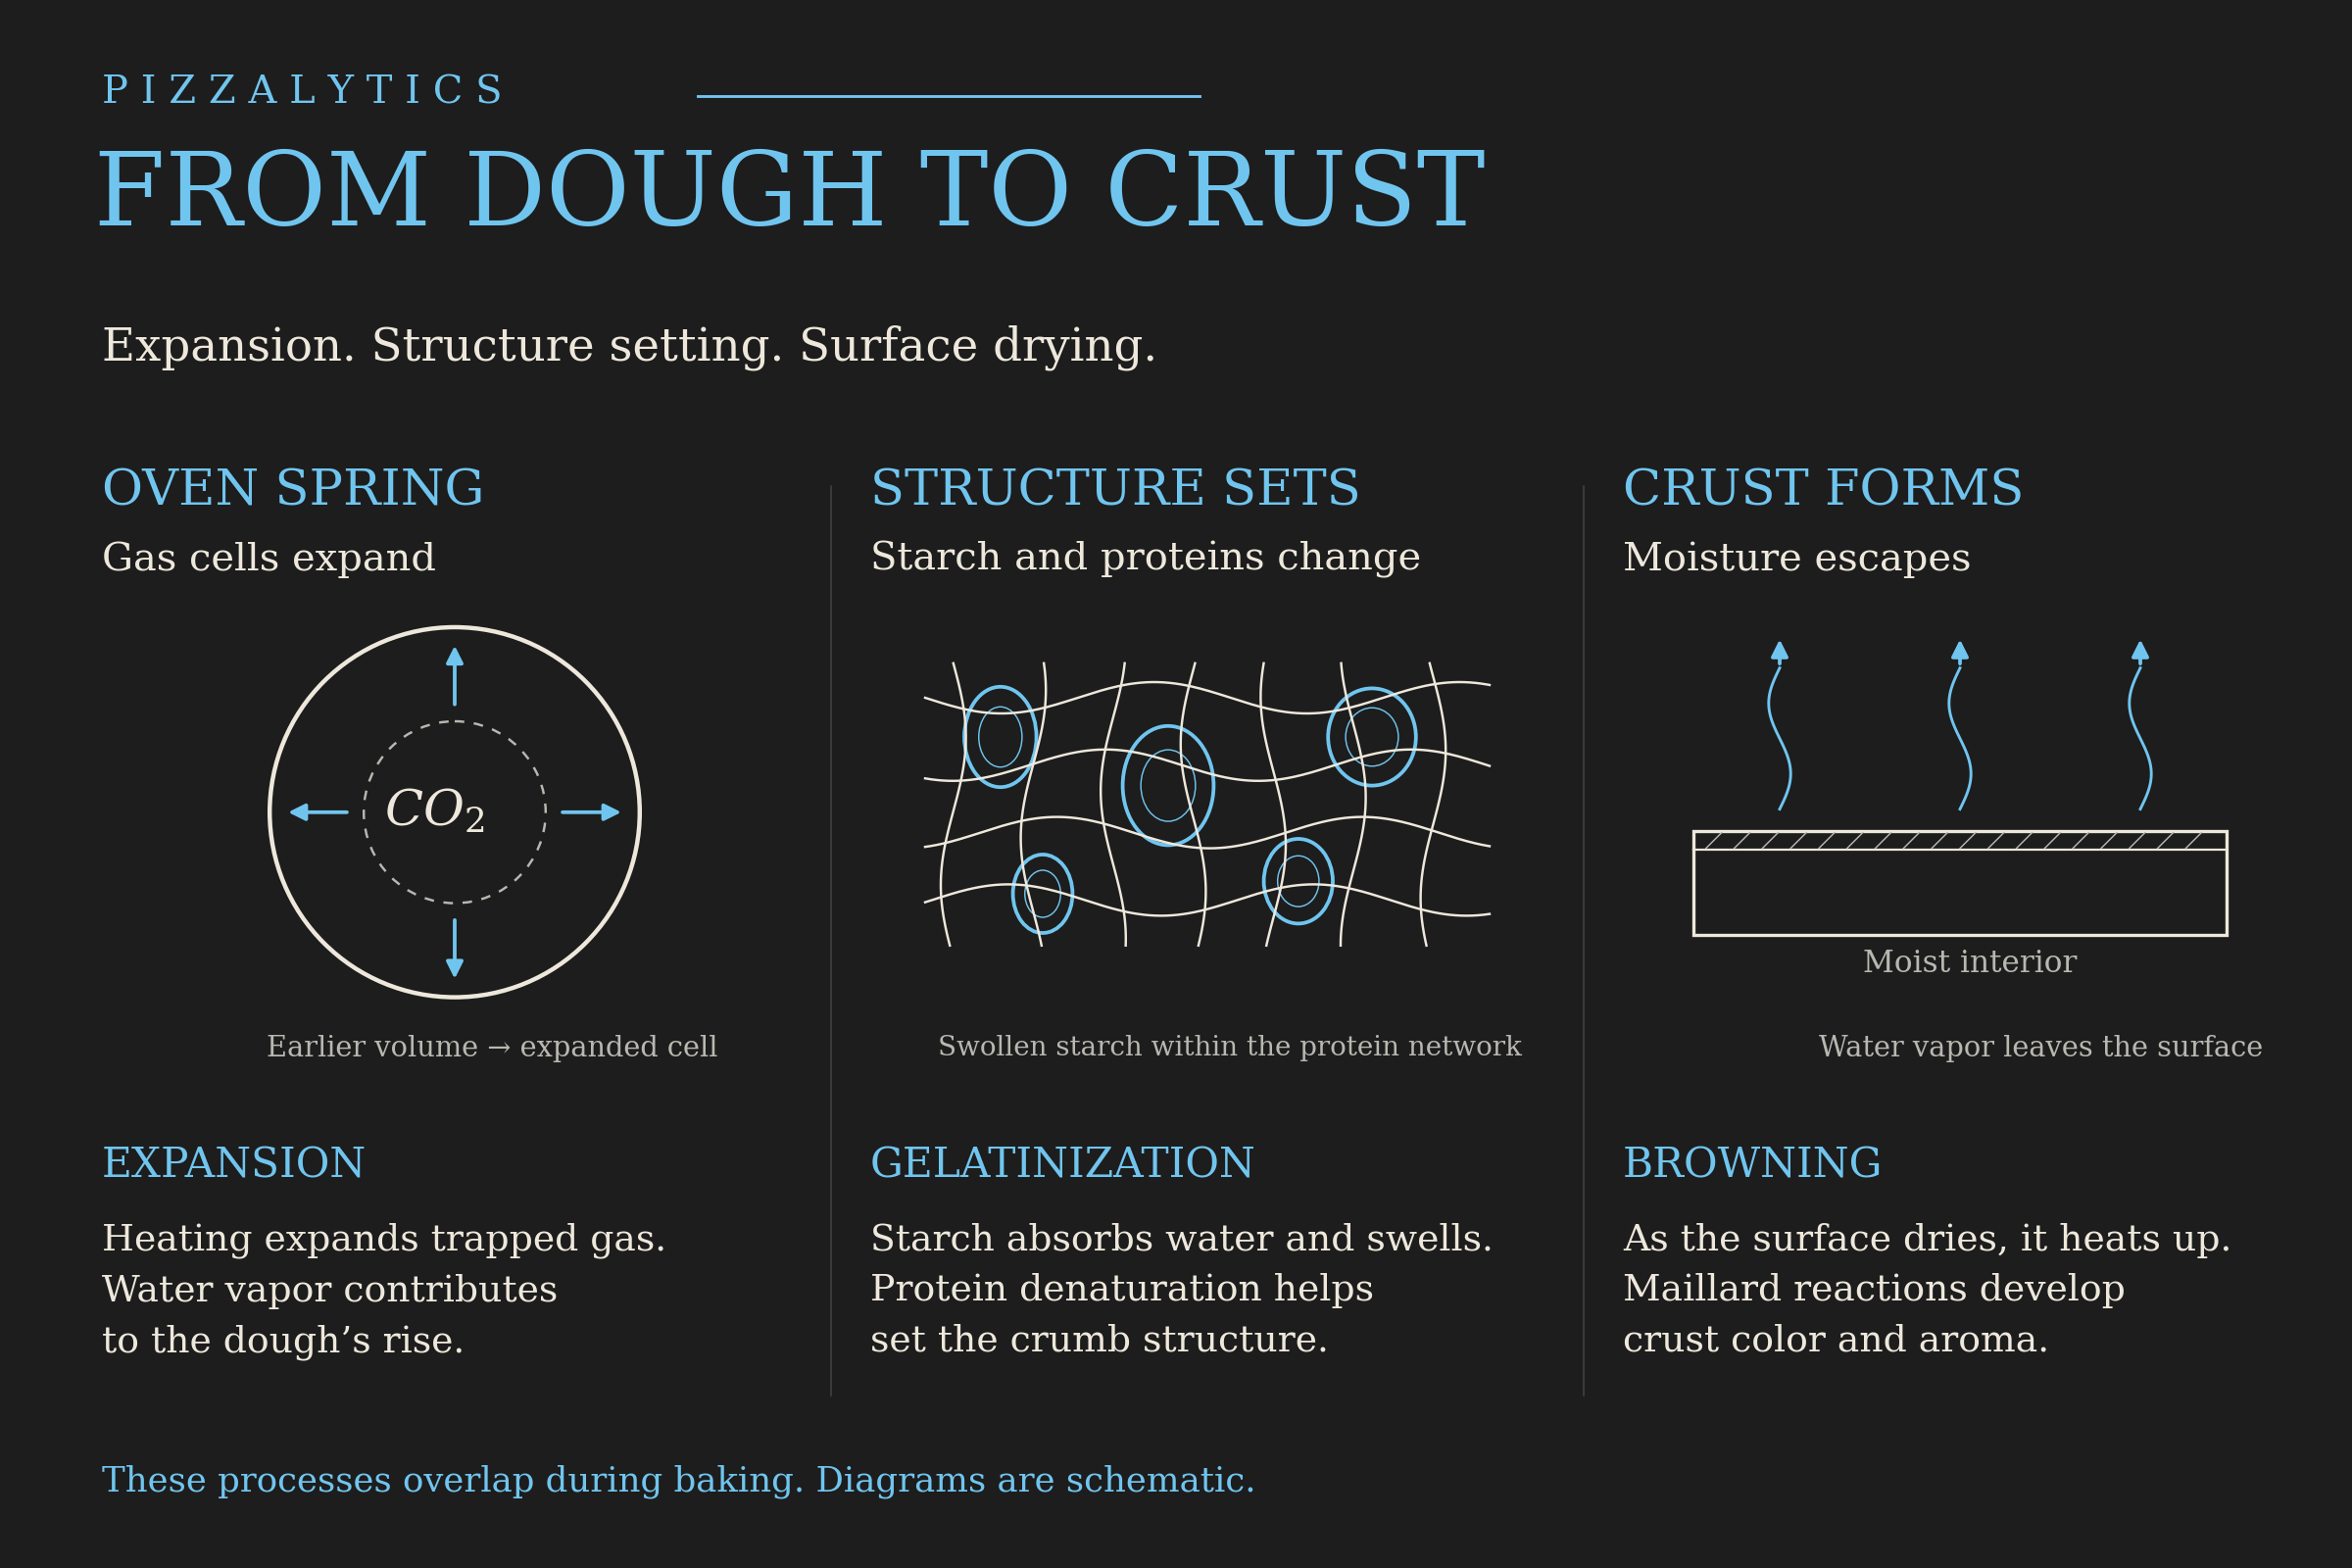
As dough heats, gases expand and water vapor contributes to oven spring. Starch gelatinization and protein denaturation help set the crumb structure. At the surface, moisture loss allows temperatures to rise, supporting browning and crust formation.
READ THE BAKE
Observe lift, underside color, surface browning, and the firmness of the base. Compare the progress of the top and bottom: one can finish before the other.
After a consistent cooling period, assess the crumb, crust thickness, crispness, and resistance to the bite. These observations help connect the oven’s heat delivery to the finished texture.
ISOLATE THE VARIABLE
Bake equal portions of the same dough for different lengths of time. Keep dough thickness, proofing, toppings, oven settings, and baking surface consistent. Allow the oven to recover between tests.
Record bake time and compare each pizza after the same cooling interval. Weighing each portion before and after baking also gives you a practical measure of baking loss, largely from moisture leaving the pizza.
The aim is to understand when structure, color, and moisture loss come into balance.
Click to dive deeper
Click to dive deeper
Trace the finished texture back to flour and water.
Investigate what happened before the dough reached the oven.
Follow the process from mixing to the finished crumb.
Have a question worth a detour? Let’s talk about your dough.
PIZZALYTICS STUDY - 001
Roman Pizza, alla Pala & Pinsa
85% Hydration · Accademia Polselli - Arce, Italy
Inside the dough—from staged hydration and fermentation to handling and baking. A closer look at how each step shapes the crumb, texture, and finished pizza.
THE GOAL
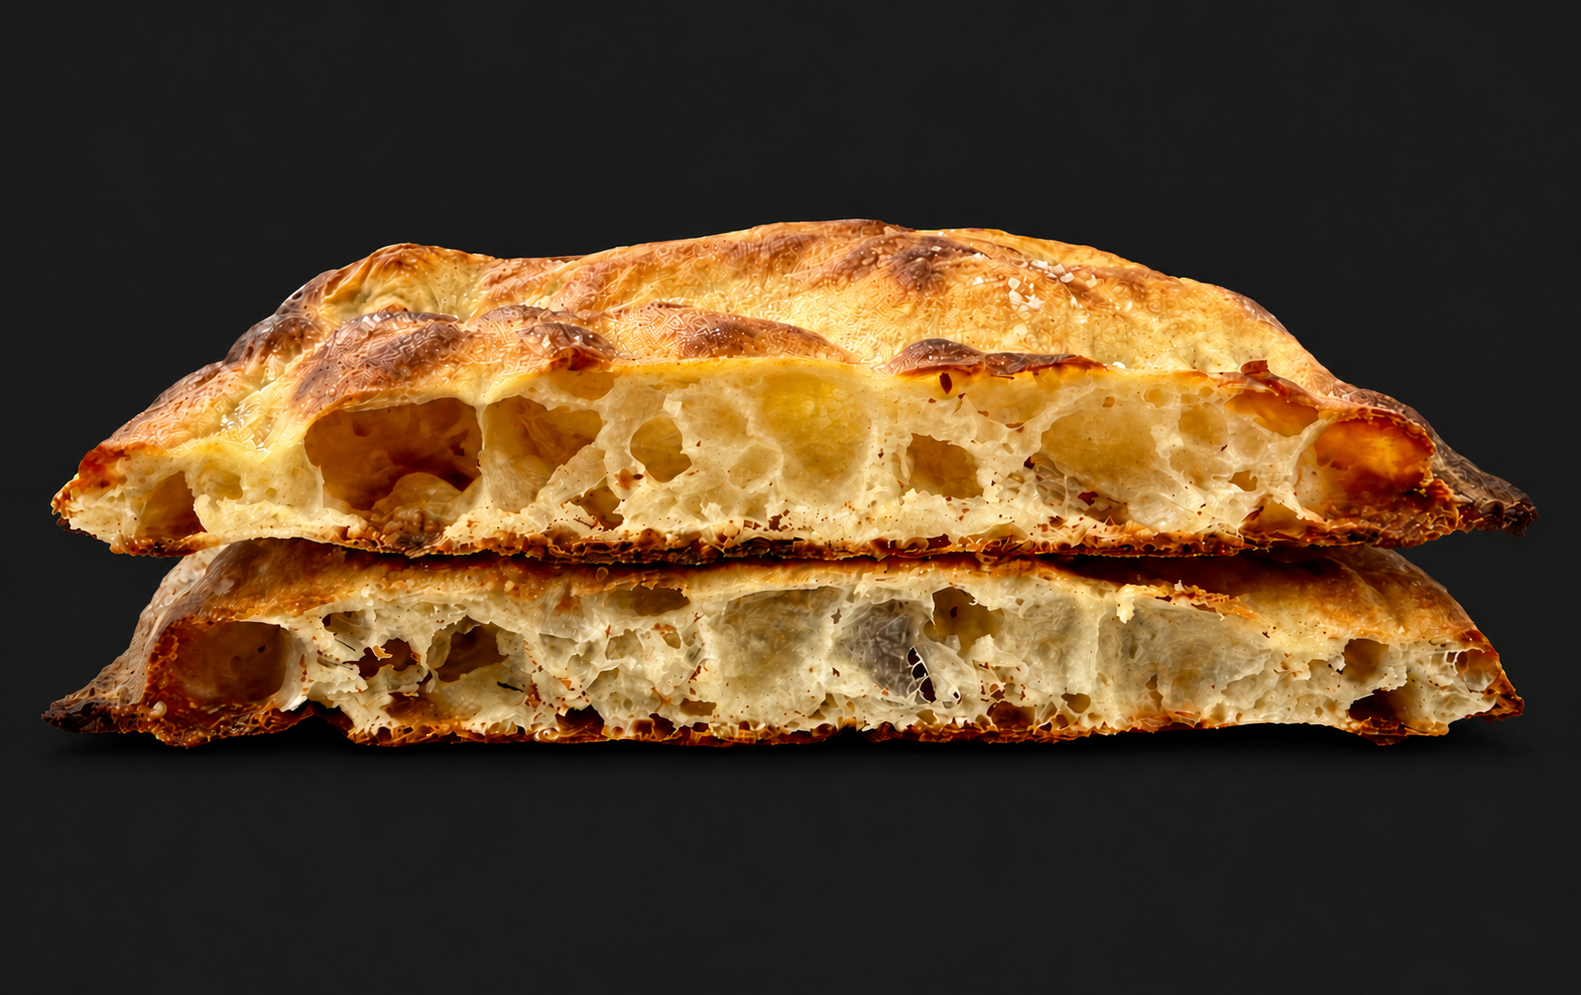
Develop a dough that holds its structure at 85% hydration, opens without losing its gas, and bakes into a light, open crumb with a crisp base.
The focus is how mixing, fermentation, handling, and heat work together to produce that result.
THE FORMULA
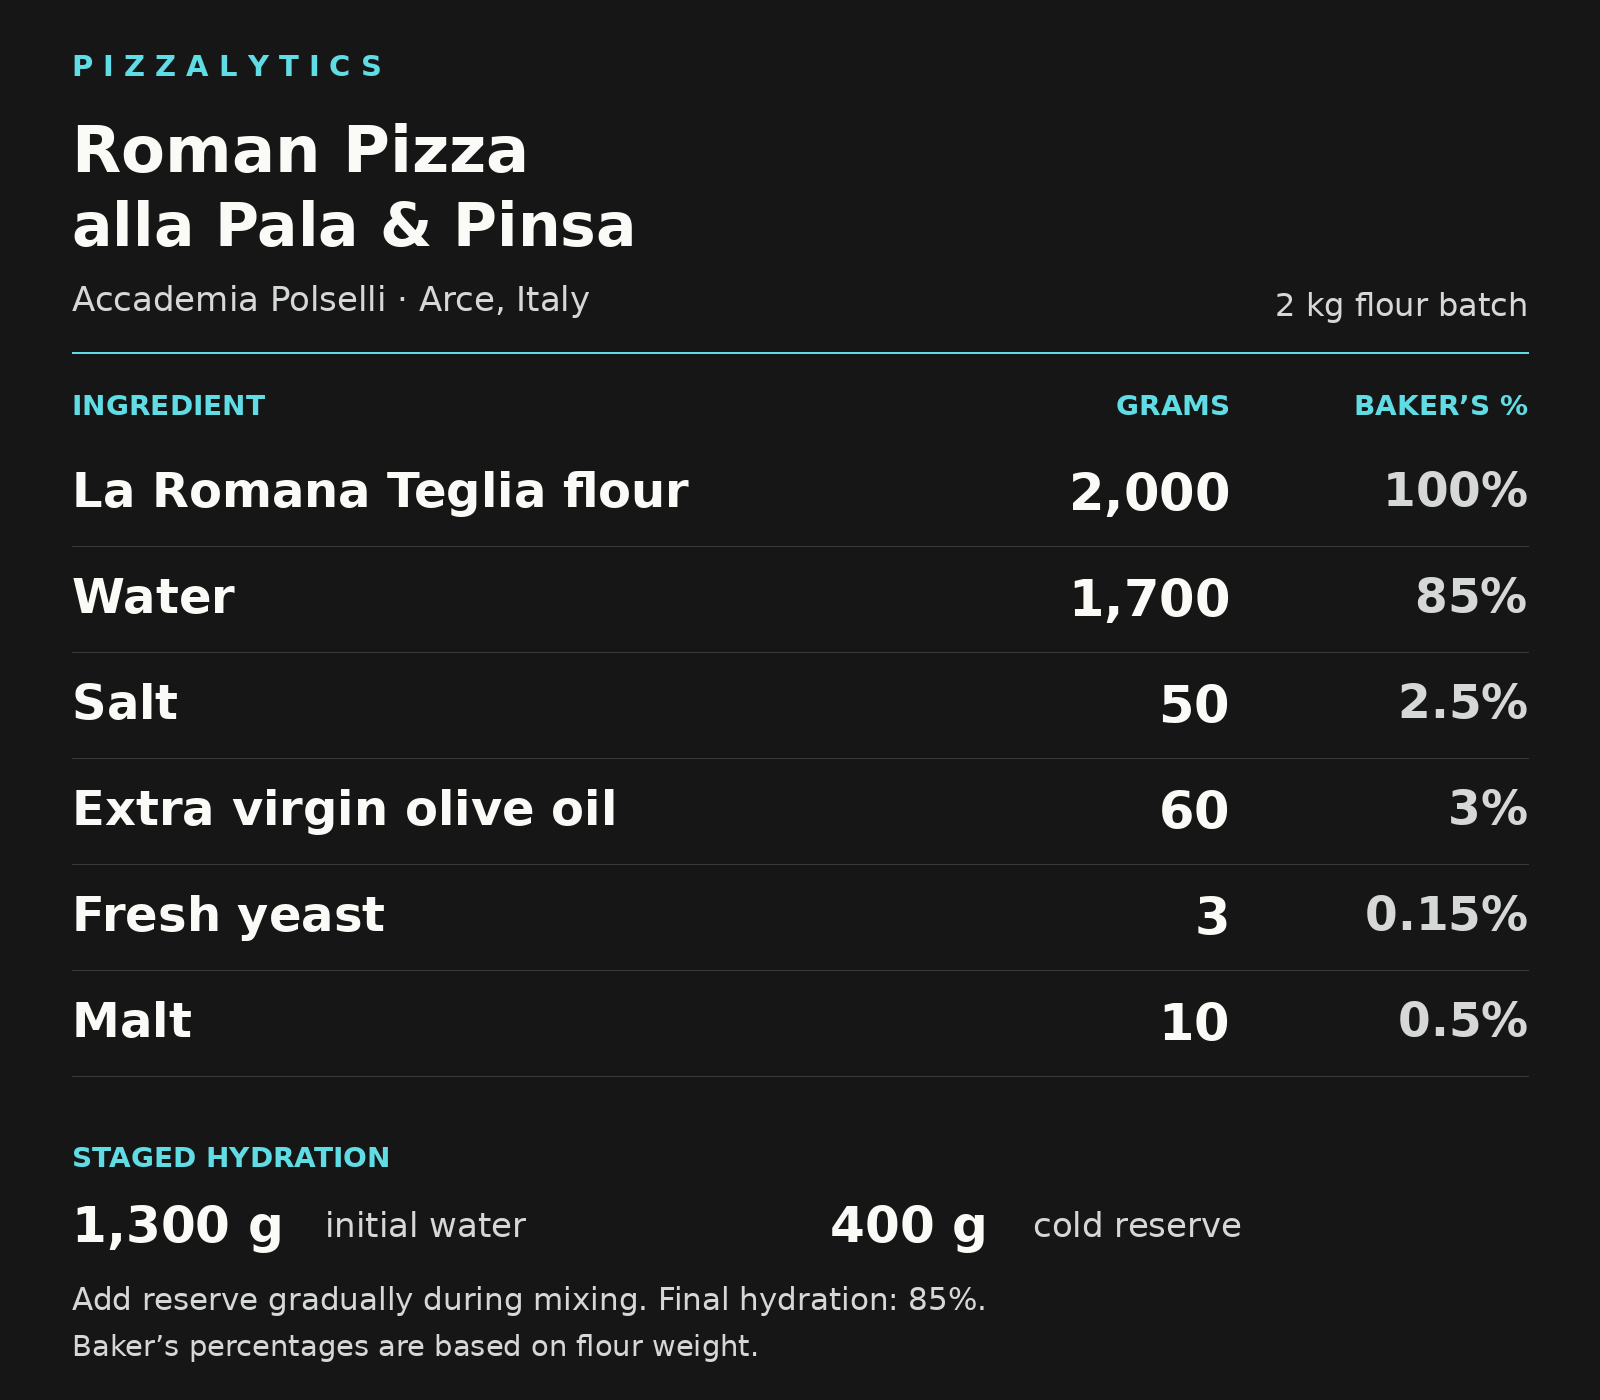
This is the starting formula used during my training at Accademia Polselli in Arce, Italy. Percentages are based on flour weight, so the proportions stay consistent when scaling the batch.
BUILDING THE DOUGH
High hydration starts with structure. For this formula, we begin at 65% hydration and reserve the remaining water cold, adding it gradually as the dough develops. Flour selection and mixing technique work together to bring the dough to 85%.
Three indicators guide the mix:
1. A clean bowl. The dough pulls away cleanly, leaving no residual dough on the bowl.
2. The “pumpkin.” The dough gathers into a rounded, cohesive mass—the pumpkin shape shown in the video.
3. Snap, crackle, and pop. Listen for the sound of the developed dough working against the bowl.
Add the cold reserve water in stages, allowing each addition to incorporate. Add the olive oil last, also in stages. Watch the dough’s response and track its temperature throughout.
MIXING
FERMENTATION & DOUGH READINESS
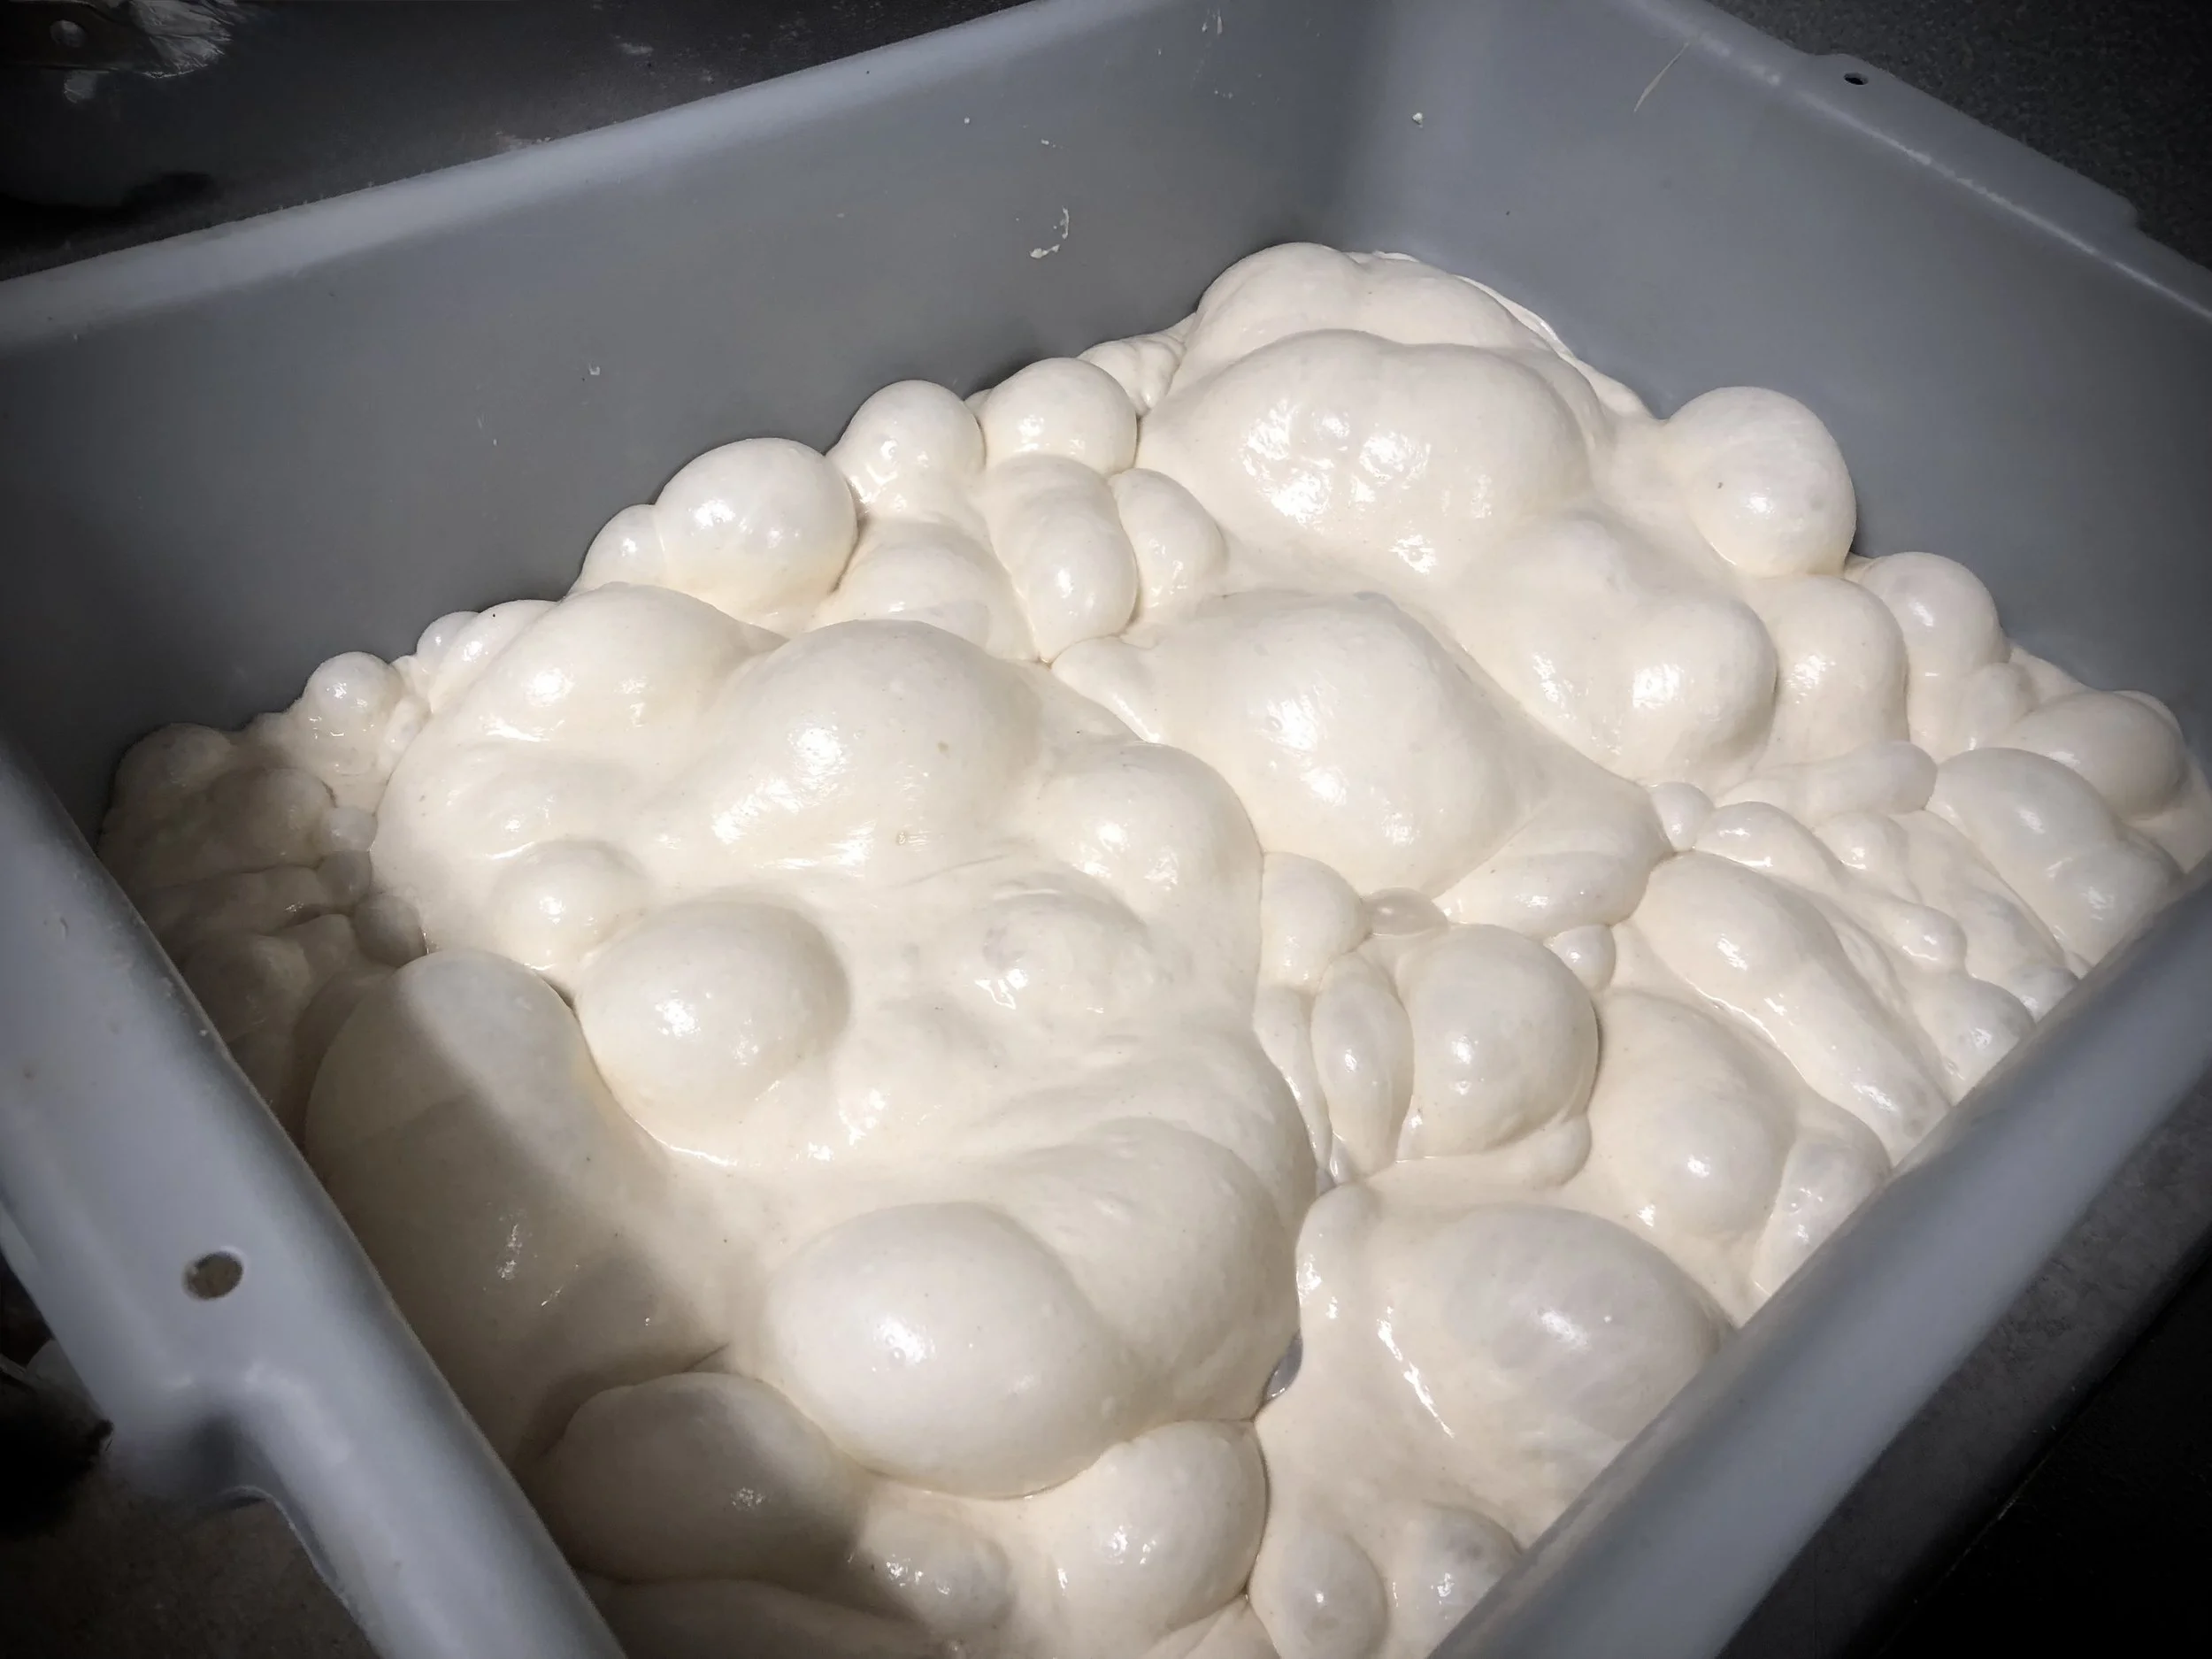
After mixing, the dough rests covered for approximately one hour, followed by about 48 hours in refrigeration.
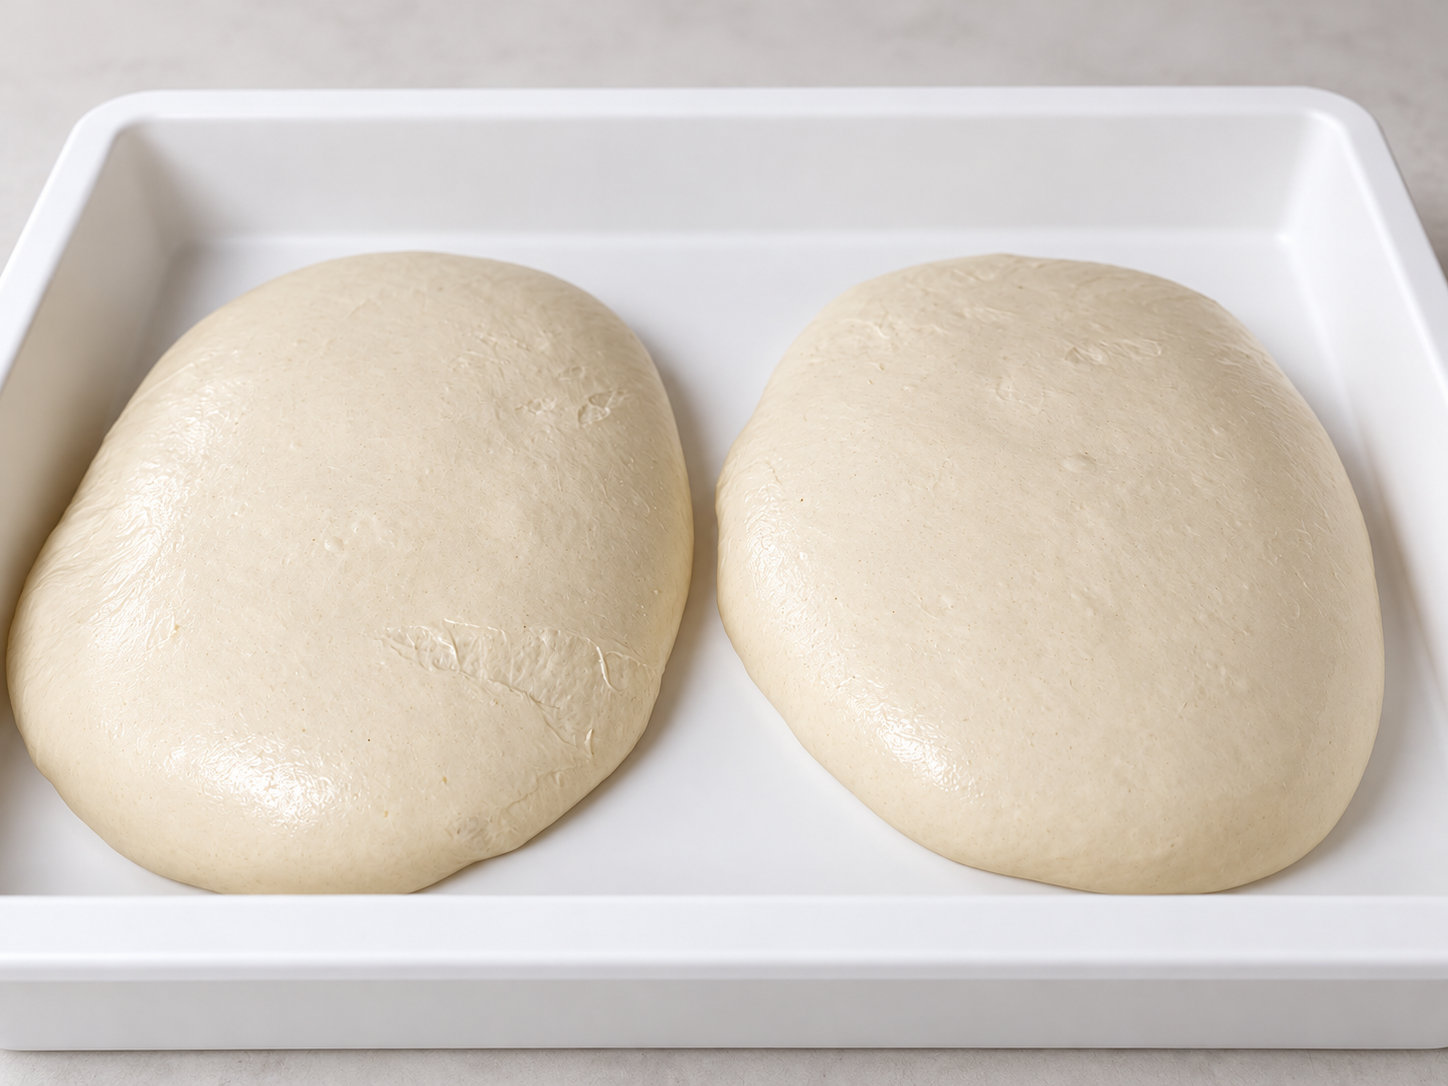
For this session, we allowed approximately one hour to temper before dividing into 600 g portions, then around three hours of final proof at 23°C.
Time gives us a reference. The dough gives us the indicators: visible expansion, retained bubbles, and a relaxed structure that opens without excessive resistance. Read those signs alongside dough temperature to judge when it’s ready.
OPENING & HANDLING
The goal now is to shape the dough while preserving the gas developed during fermentation.
Work with gentle, deliberate pressure, distributing the dough evenly without flattening its structure. Watch how it responds: it should extend willingly while retaining visible bubbles. If it pulls back, allow it more time to relax.
This is where touch connects the process to the result—feeling how much pressure the dough needs and when to let it rest.
OPENING THE ROUND
THE BAKE
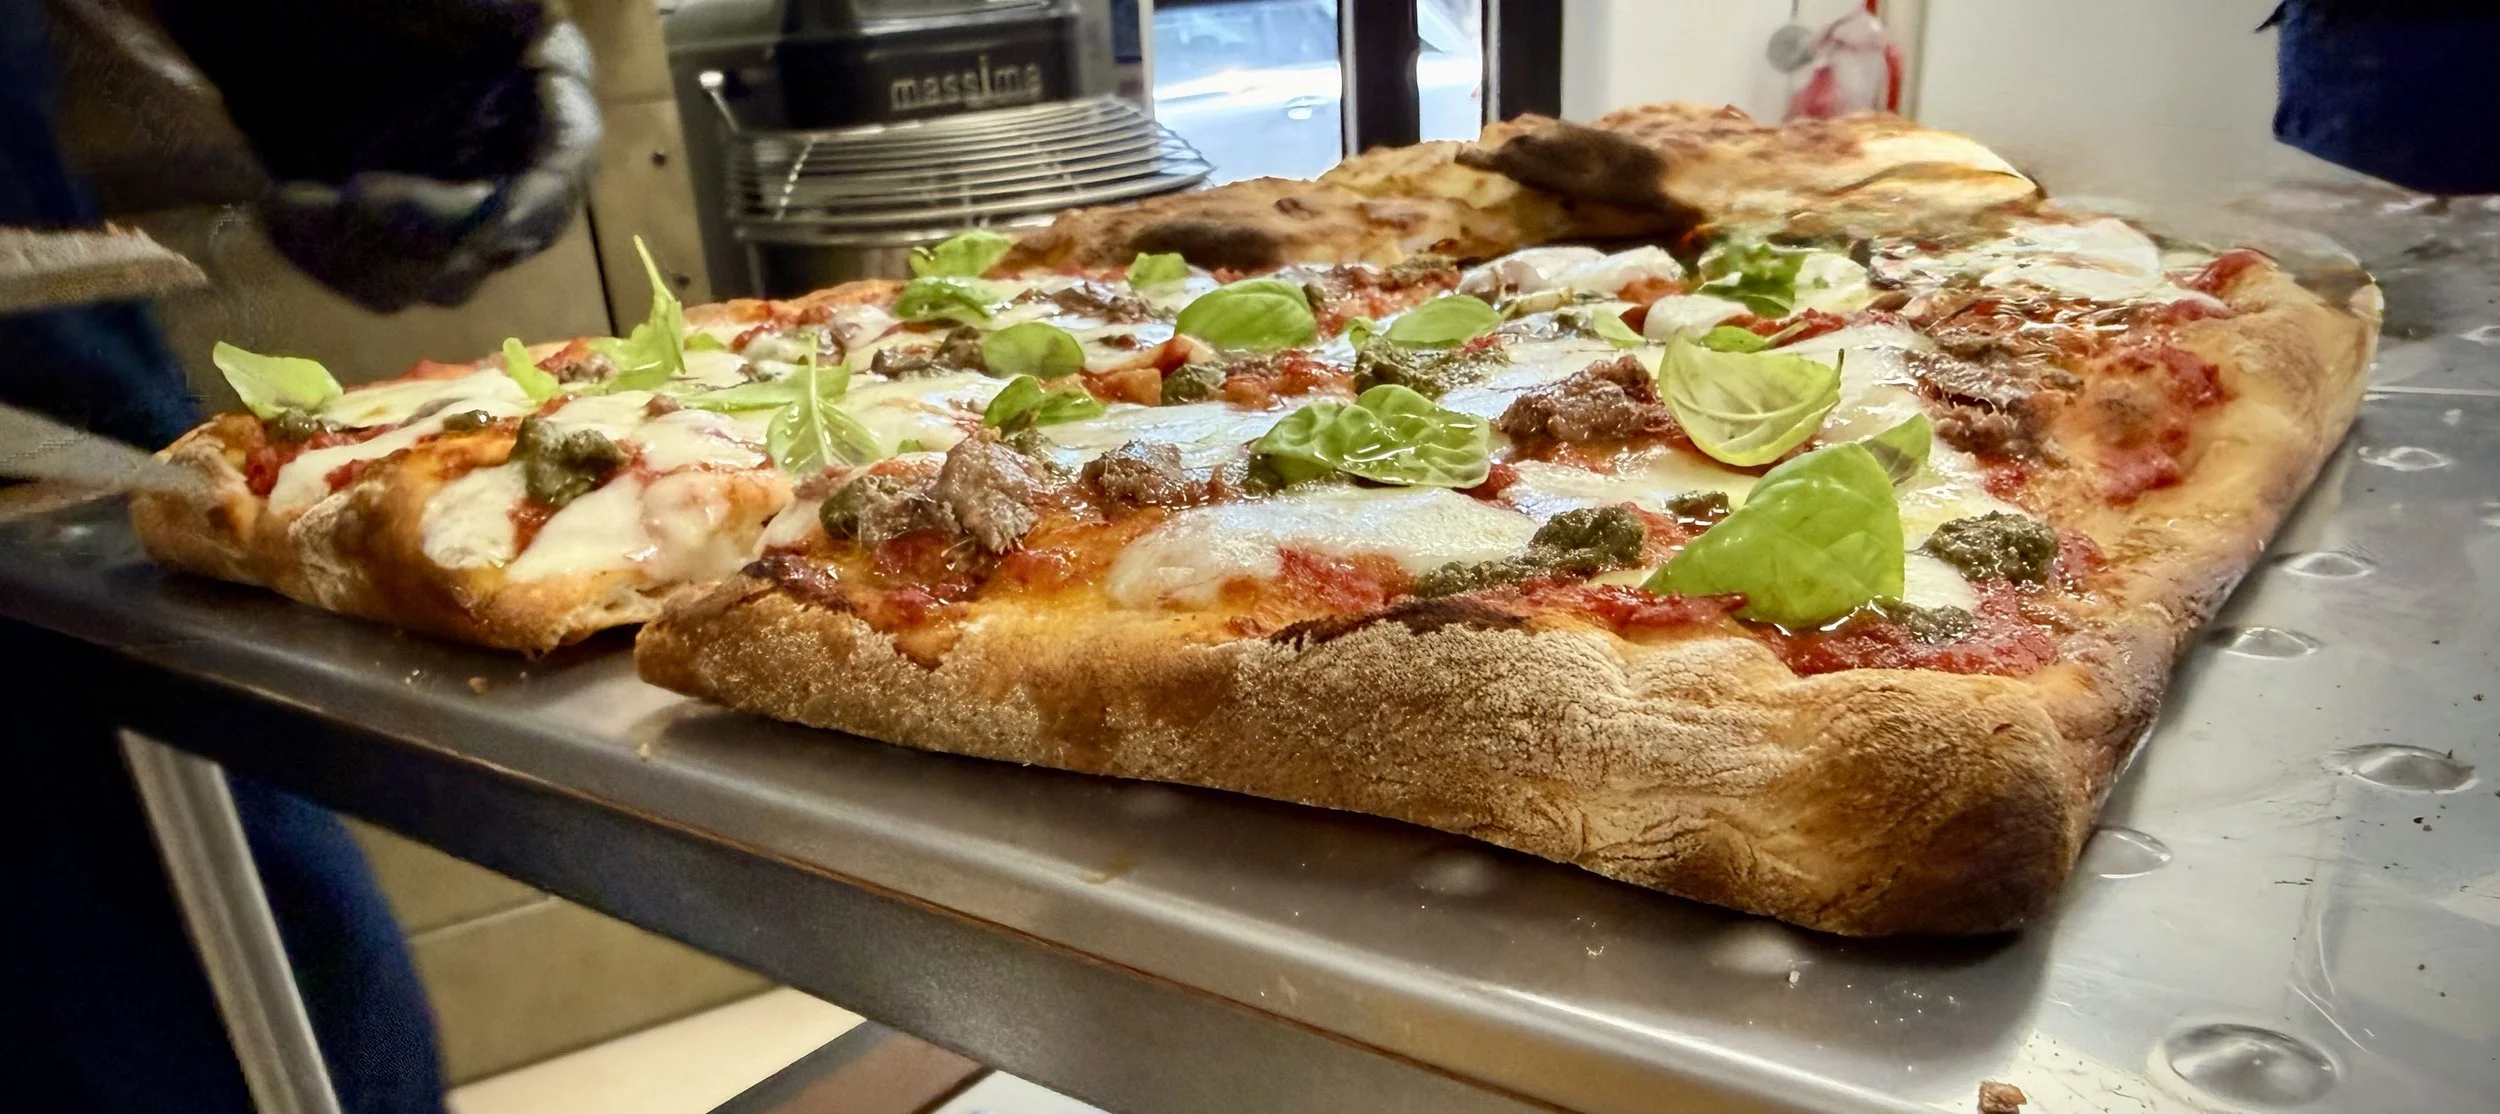
The goal is a crisp base and a light, open interior. In this session, we used an initial bake to establish the structure, followed by a finish directly on the stone.
Watch the pizza as it bakes: the lift, the developing color, and the firmness of the base. Each gives us information about how the dough is responding to heat.
Once baked, let it cool slightly before cutting so we can examine the crumb and assess the texture.
BAKING THE PIZZA
READING THE RESULT
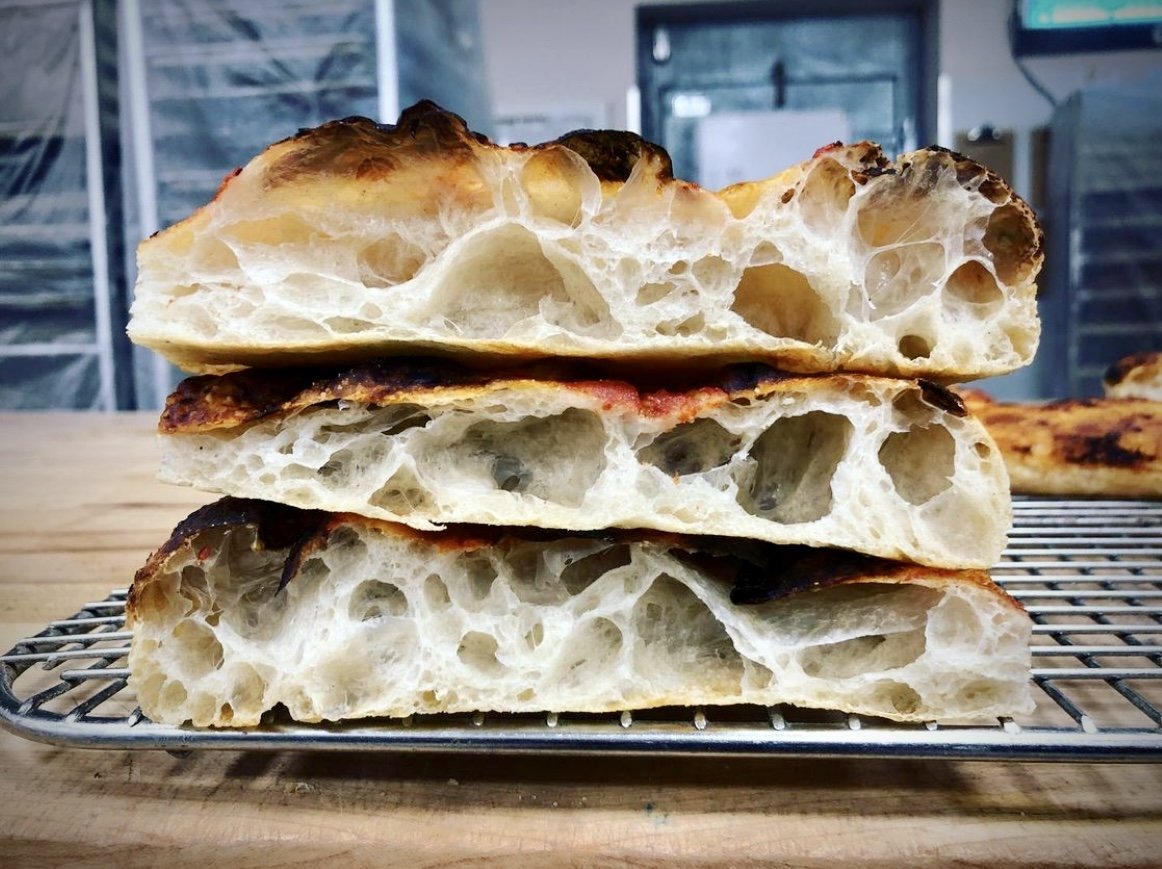
Cutting into the pizza gives us another way to evaluate the process. Look at the distribution of air pockets, the thickness of the walls between them, and the transition from the interior to the base.
Then bring in the other senses: the crackle as you cut, the resistance as you bite, and the balance between a crisp exterior and a tender crumb.
Together, those observations help us judge how closely we reached the goal—and what we might adjust in the next bake.

BEYOND THE FORMULA
The formula gives us a starting point. How we mix, ferment, handle, and bake the dough shapes the result.
The useful part is connecting those decisions to what we can see, feel, hear, and taste. Those observations give us a direction for the next batch: a question to investigate, a variable to change, and a result to compare.
CURRENTLY TESTING…
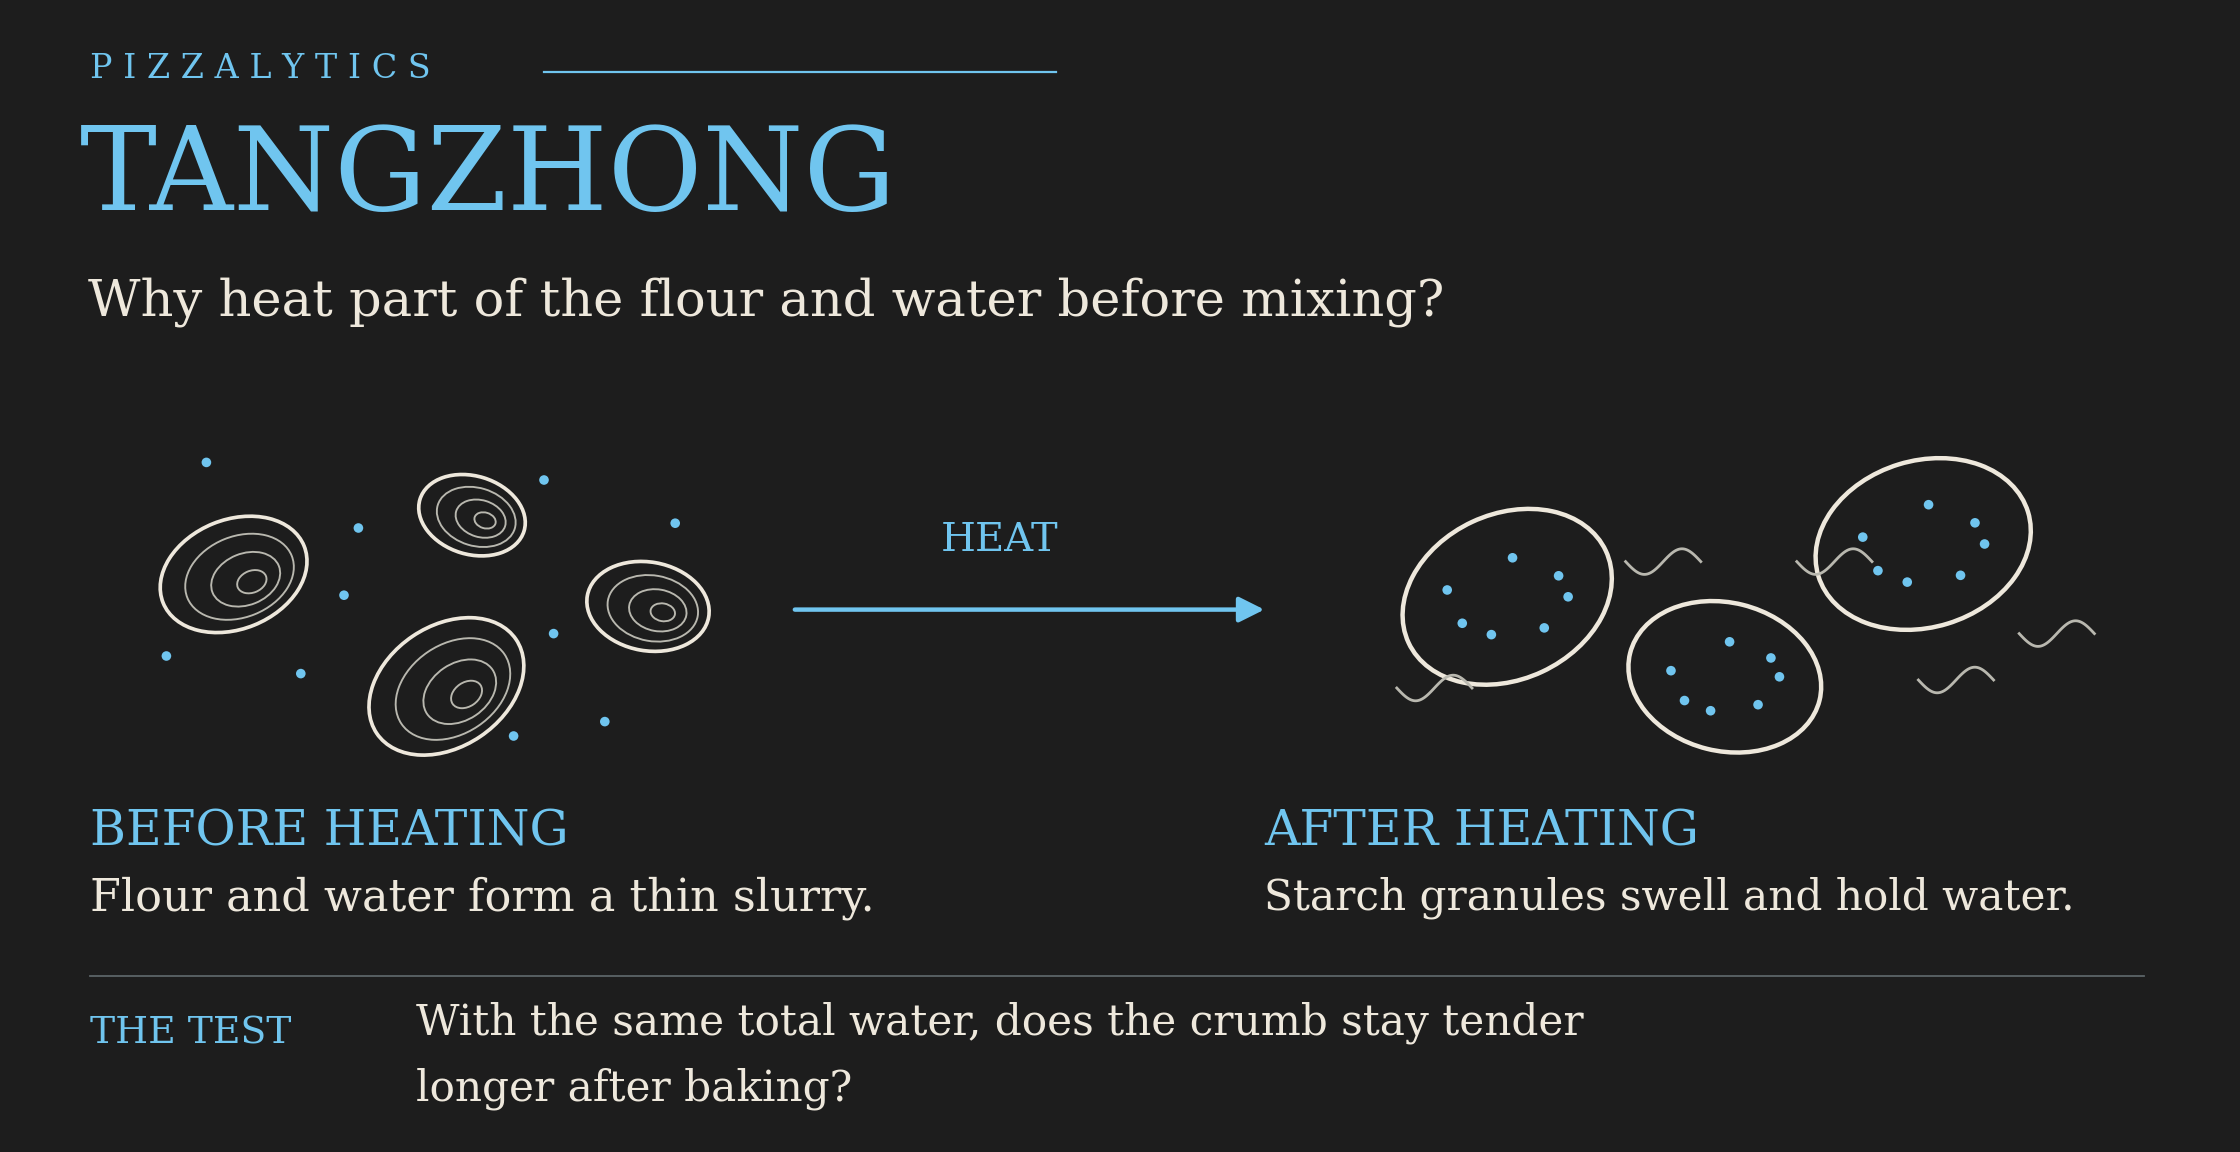
Exploring tangzhong—using heat to gelatinize starches in a portion of the formula’s flour and water—to investigate moisture retention, texture, and lasting freshness across different pizza doughs.
Same ingredients. A different technique. More to discover.
WHAT ARE YOU WORKING ON?
A result you can’t explain? A technique you want to understand better? Tell me what you’re seeing and what you’re trying to achieve. It could be the start of our next investigation.